ClickLearn Attain provides a range of deployment options for hosting your learning content. Some of these are the Content Cloud, SharePoint, and SCORM. You can deploy your content on any of these platforms depending on the end users you want to reach out to and other requirements you might have to cater to.
This deployment guide describes the Microsoft SharePoint© deployment option and the benefits that you get when you deploy your learning content inside SharePoint. Further, it provides a step-by-step procedure that you can follow to deploy your content on the SharePoint application.
What is Microsoft SharePoint©?
Microsoft SharePoint© is a web-based application used for managing learning content, sharing documents, and efficiently collaborating with your team. It offers a host of benefits, such as:
- Advanced search options
- Data security
- Superior content delivery
- Simple customizations
- Design support
Content hosting on the Microsoft SharePoint© Site
Microsoft SharePoint© has a web-based user interface which can be configured mainly by using a web browser. This user interface mostly contains all the features that you need to configure SharePoint.
Content on a Microsoft SharePoint© site can be further organized into sub-sites and comprises of apps, pages, and content types. Based on your permission level, you can manage the content and site structure by using the web-based user interface.
However, the content that the end users view on a SharePoint site is not hosted on the SharePoint servers. The content is hosted on a separate server designated by the organization for content hosting. This content is then federated to the SharePoint site from the content server and displayed to the end users on the SharePoint web interface.
For example, in ClickLearn Attain, the content that you publish is hosted on the Content Cloud and the URL for the same is provided to you. This content URL is then copied and used on the SharePoint site to fetch the content from the Content Cloud and display on the SharePoint interface. The steps for this process are given further in this guide.
Deploying ClickLearn Content on the SharePoint App
Download the ClickLearnContentV2.sppkg from the below link.
https://clicklearncompublic.blob.core.windows.net/apps/Sharepoint/ClickLearnContentV2-v1.0.0.0.sppkg
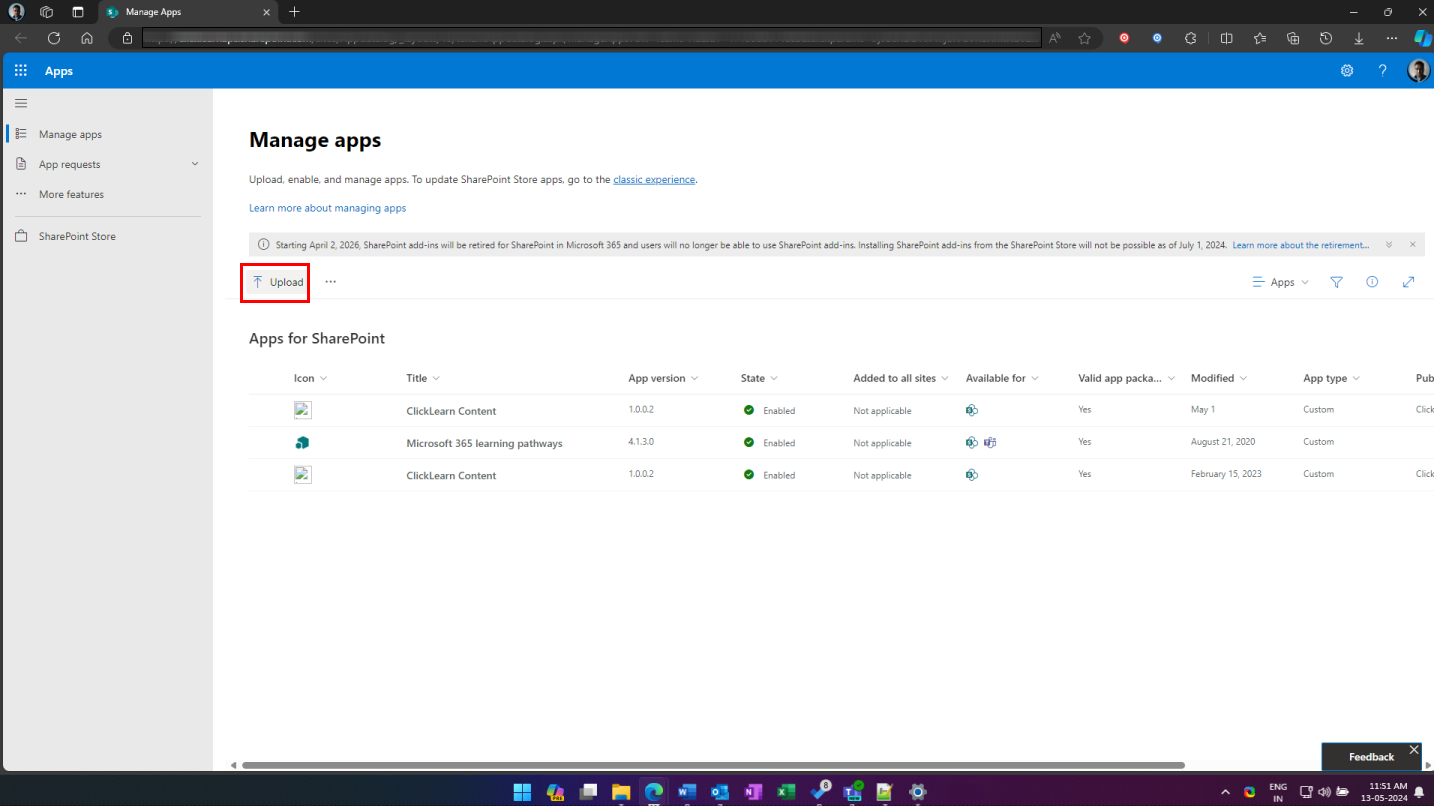
- Navigate to the SharePoint App catalogue. Click on the button Upload.
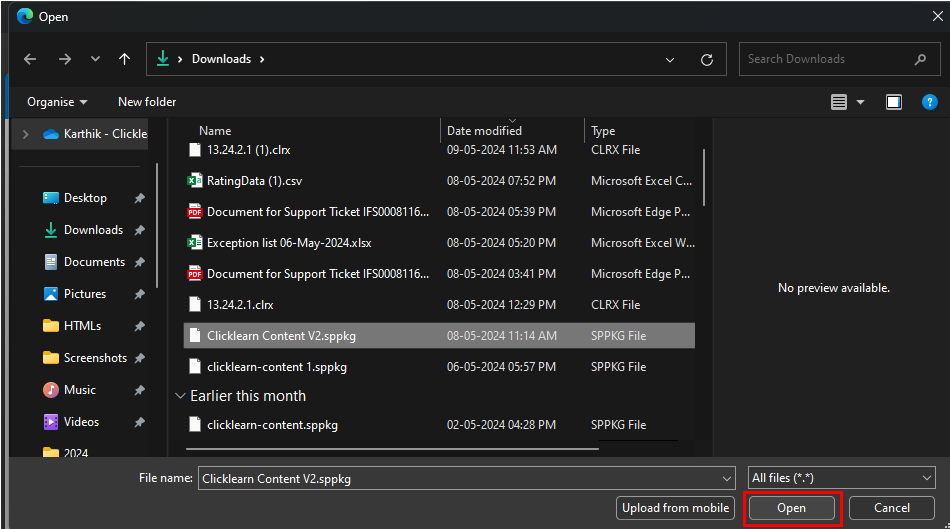
- Select the package you want to upload.
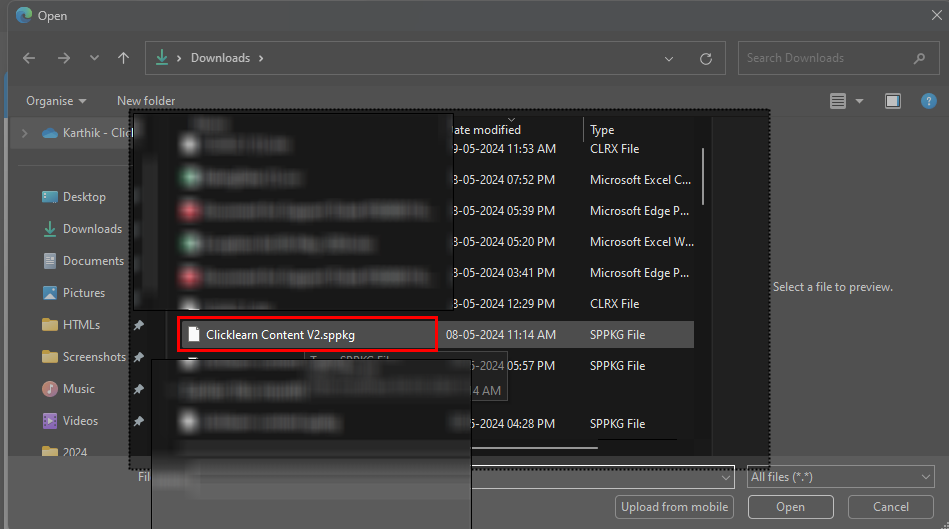
- Click on the Open button.
- You can use the default setting to apply the application across all sites. However, it is advisable to turn off the team's features for optimal performance. Otherwise, you should follow the below steps and make sure to add the app to each site.
Note: It's recommended you use the option "Only enable this app."
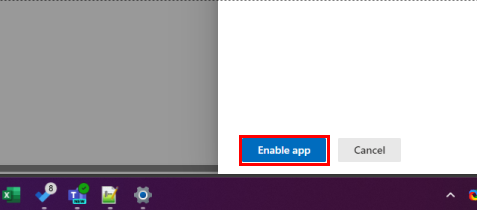
Click on the label: Only enable this app.

- Click on the button Enable app.
- A success message will appear, and then you can close the modal.
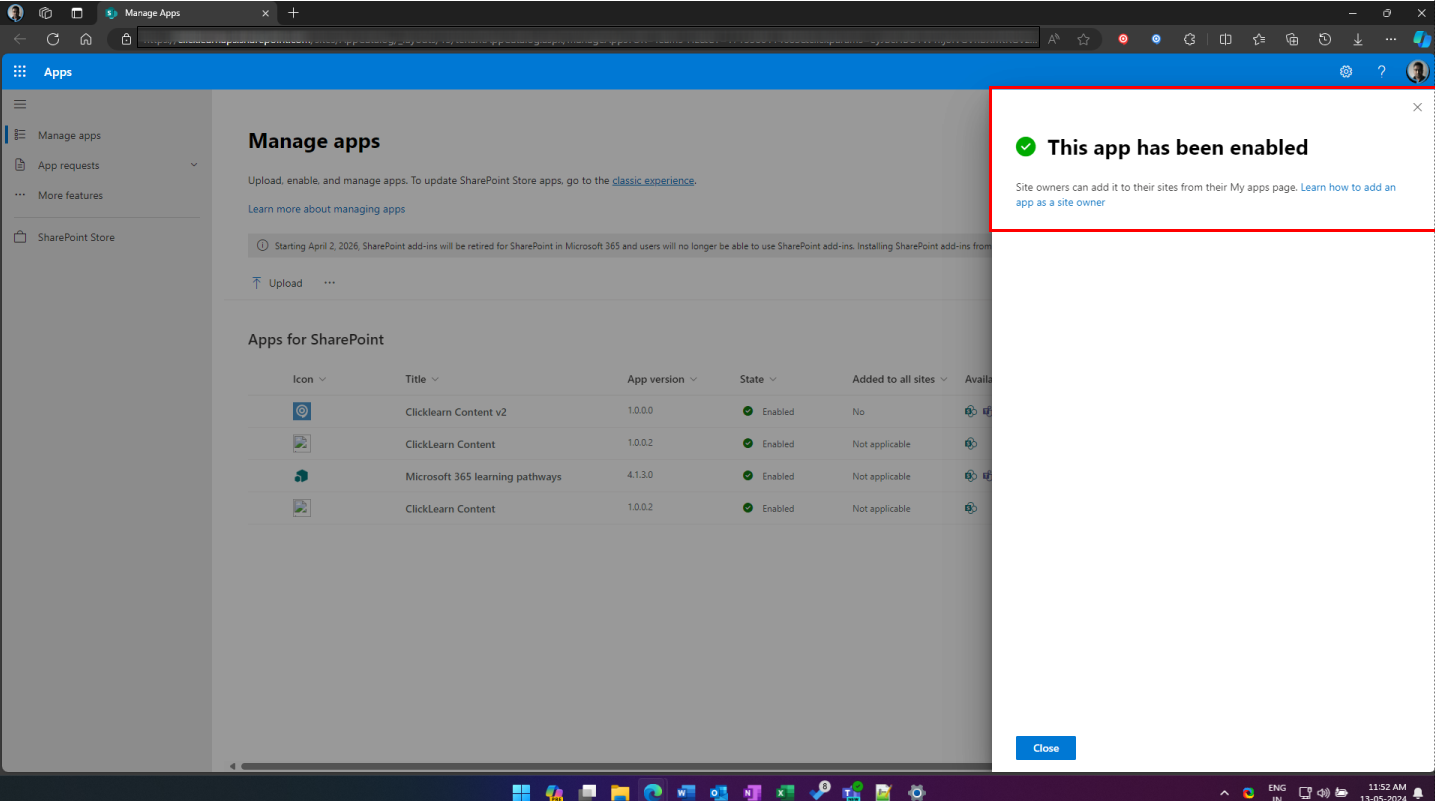
- Click on the button Close.
Deploying ClickLearn Content on the SharePoint App[obsolete]
This was developed using the old framework, but it's recommended that you install the ClickLearnContnetV2 package, which was developed using the new framework.
- Download the ClickLearnContent.app file from the following link: https://clicklearncompublic.blob.core.windows.net/apps/Sharepoint/ClickLearnContent-v1.0.0.2.app
- Navigate to the SharePoint app catalogue.
- Click the Apps for SharePoint option in the navigation pane on the left.
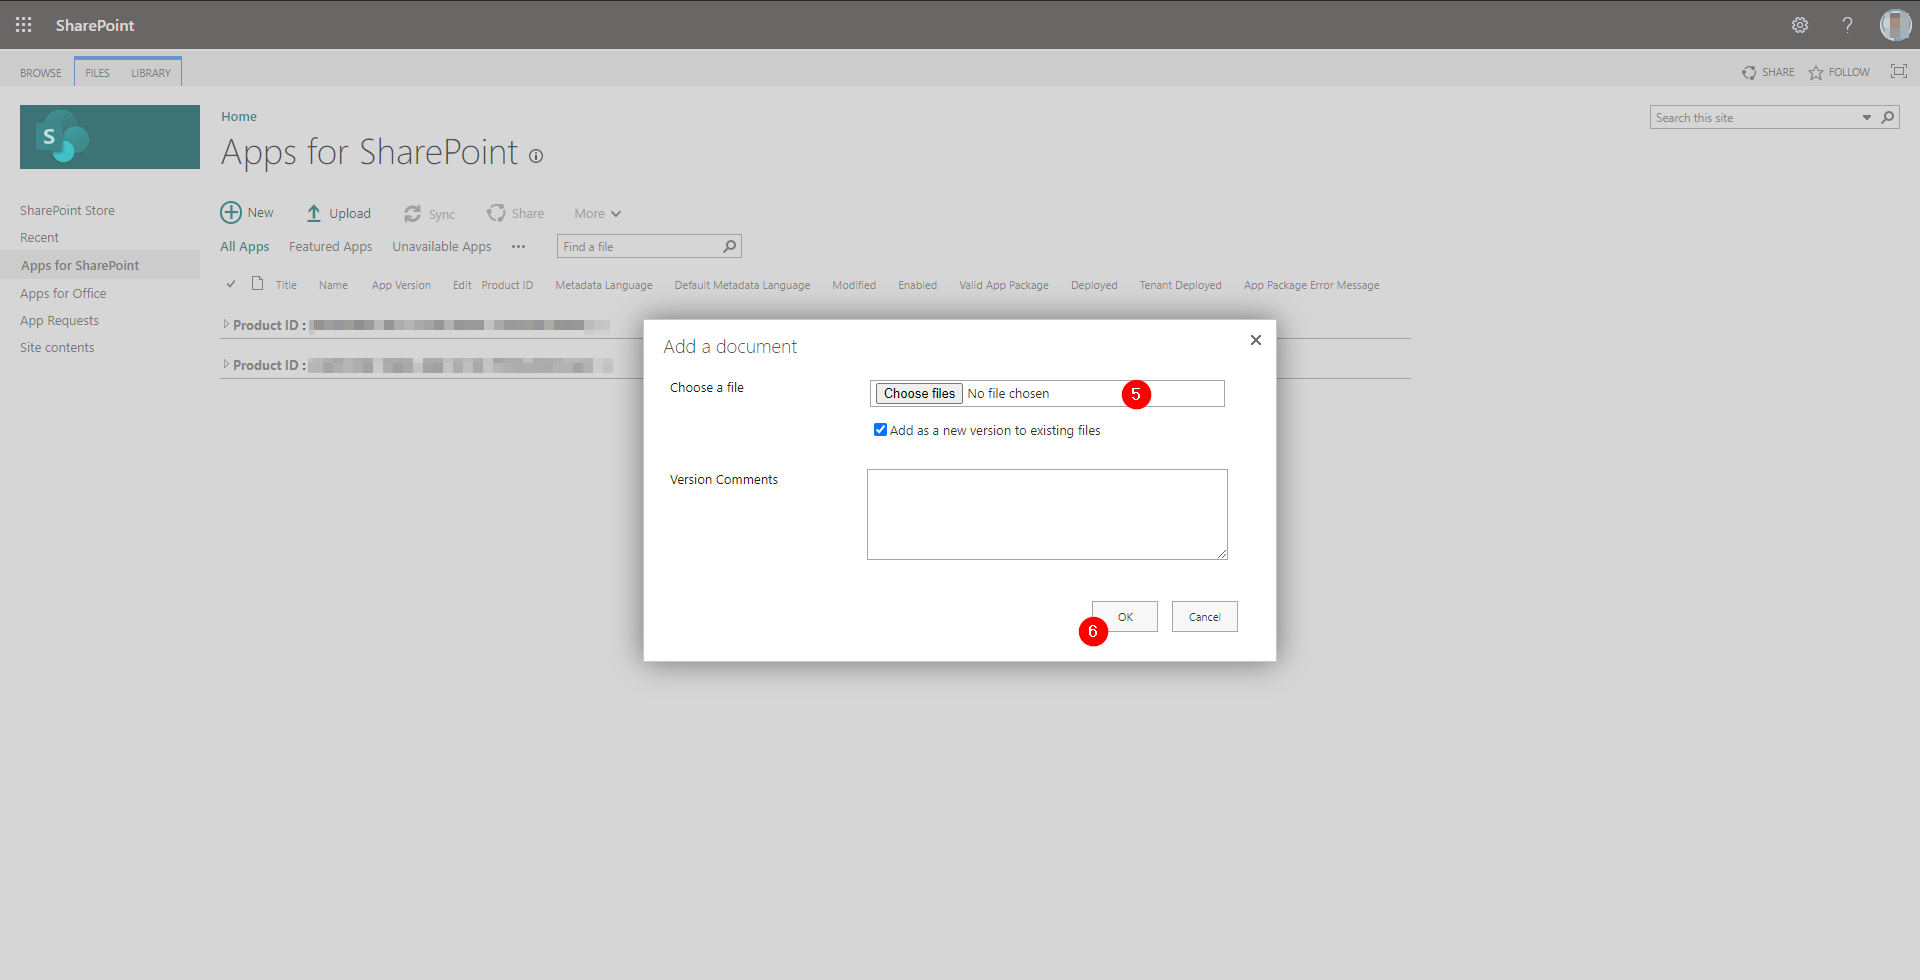
- On the Apps for SharePoint screen, click Upload.

- Click the Choose Files button and browse to the folder where you saved the ClickLearnContent.app file.
- Click OK.
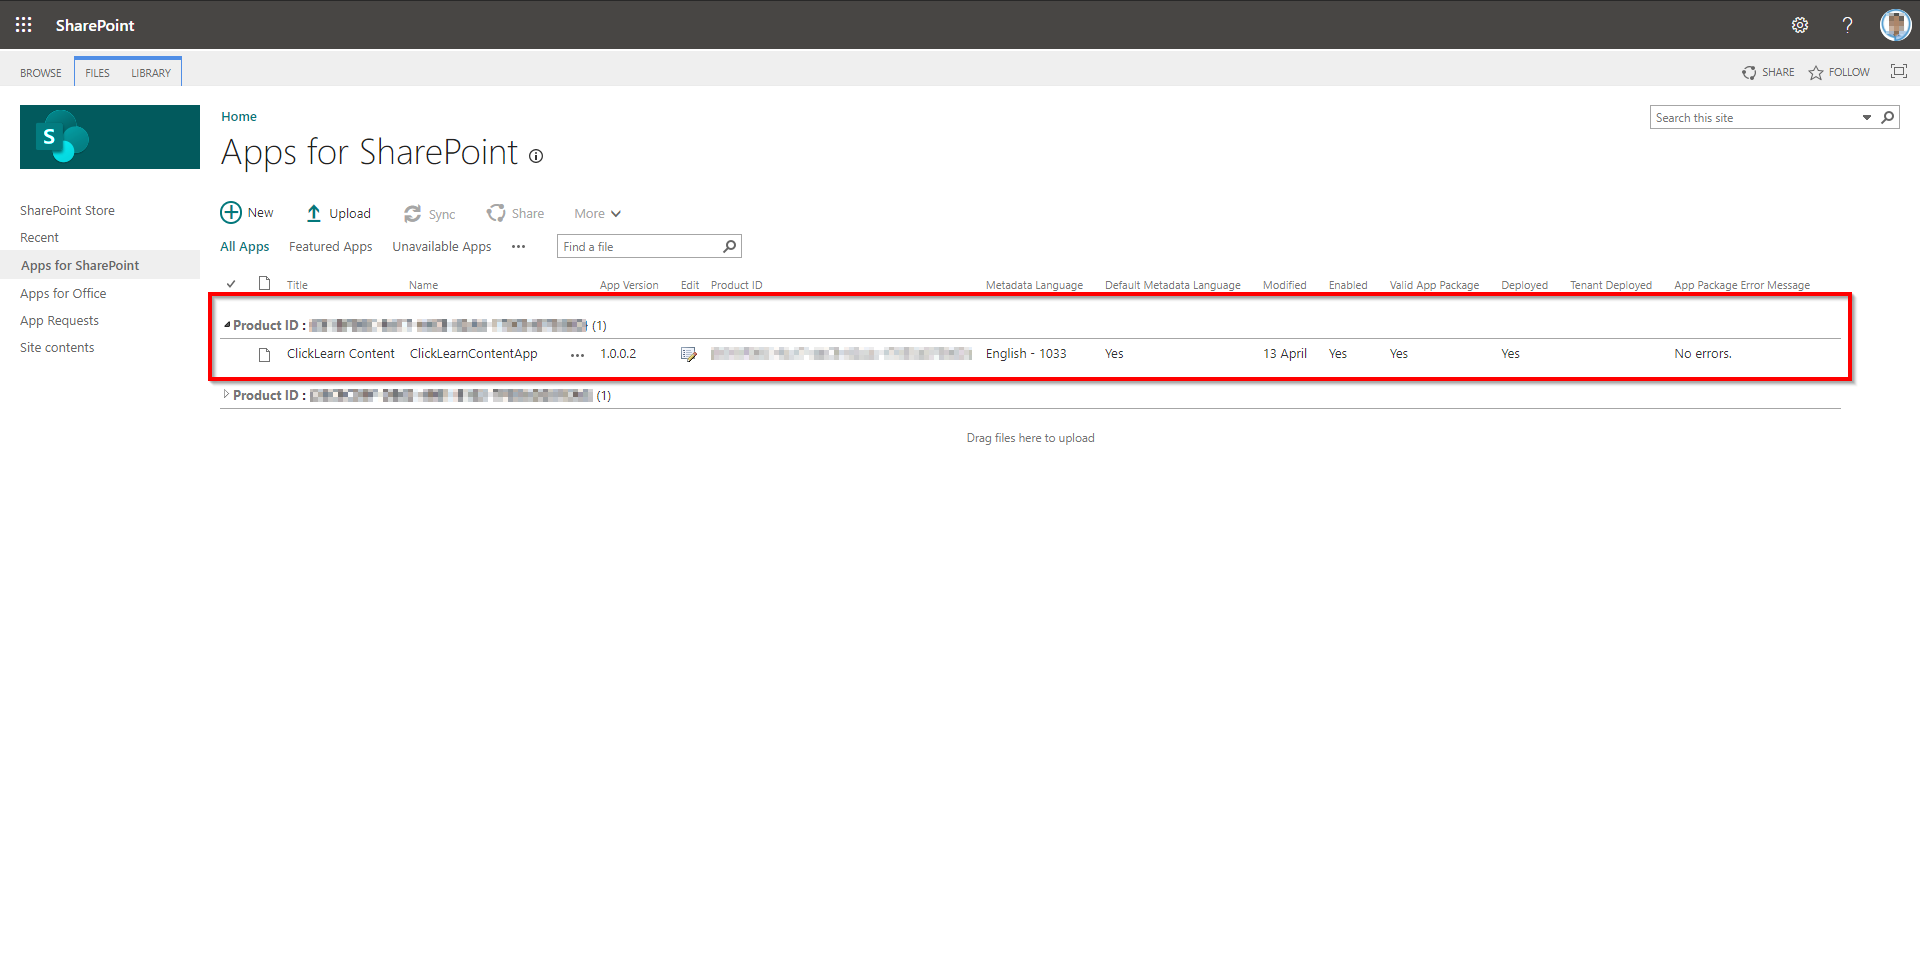
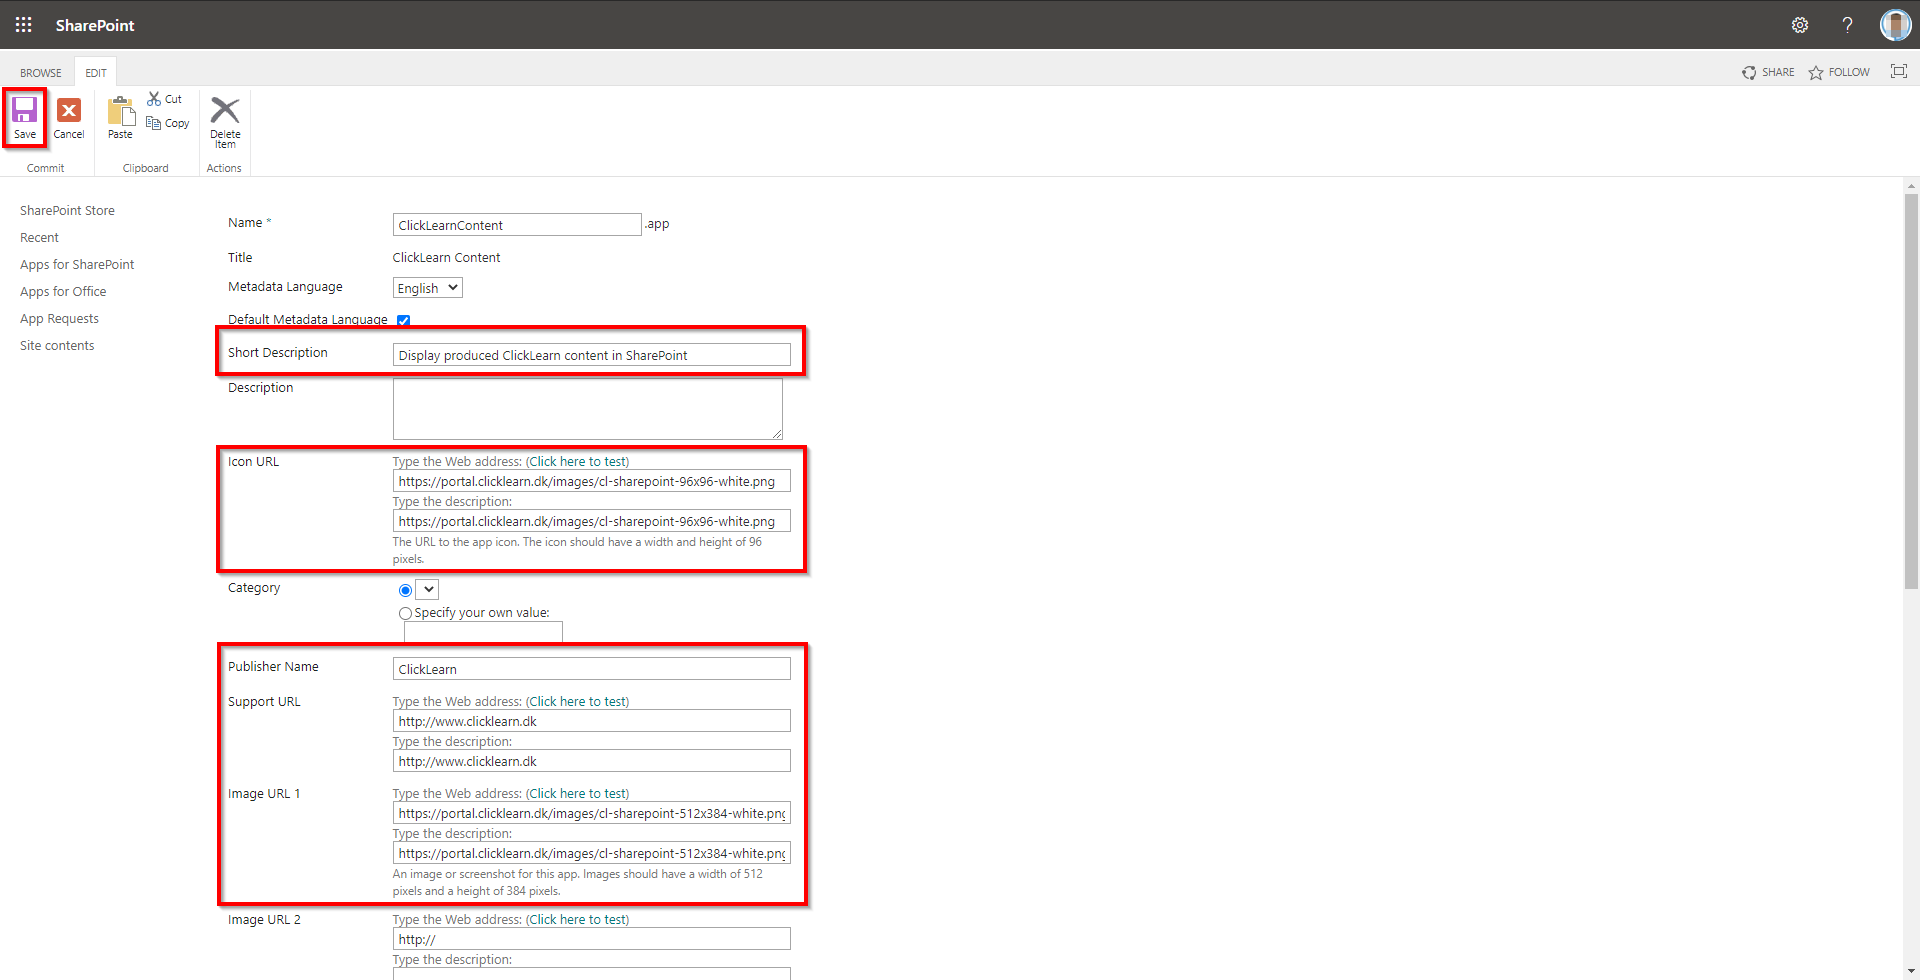
When you click OK, a new record with the name ClickLearnContent.app is displayed on the screen. You can see this in the screenshot below.
- Click the Edit property icon as shown in the screenshot below.

- Specify the property values as mentioned below in the corresponding fields on the screen.
- Click the Save button.
- Short description
- Display produced ClickLearn content in SharePoint
- Publisher Name
- ClickLearn
- Support URL
- https://www.clicklearn.com
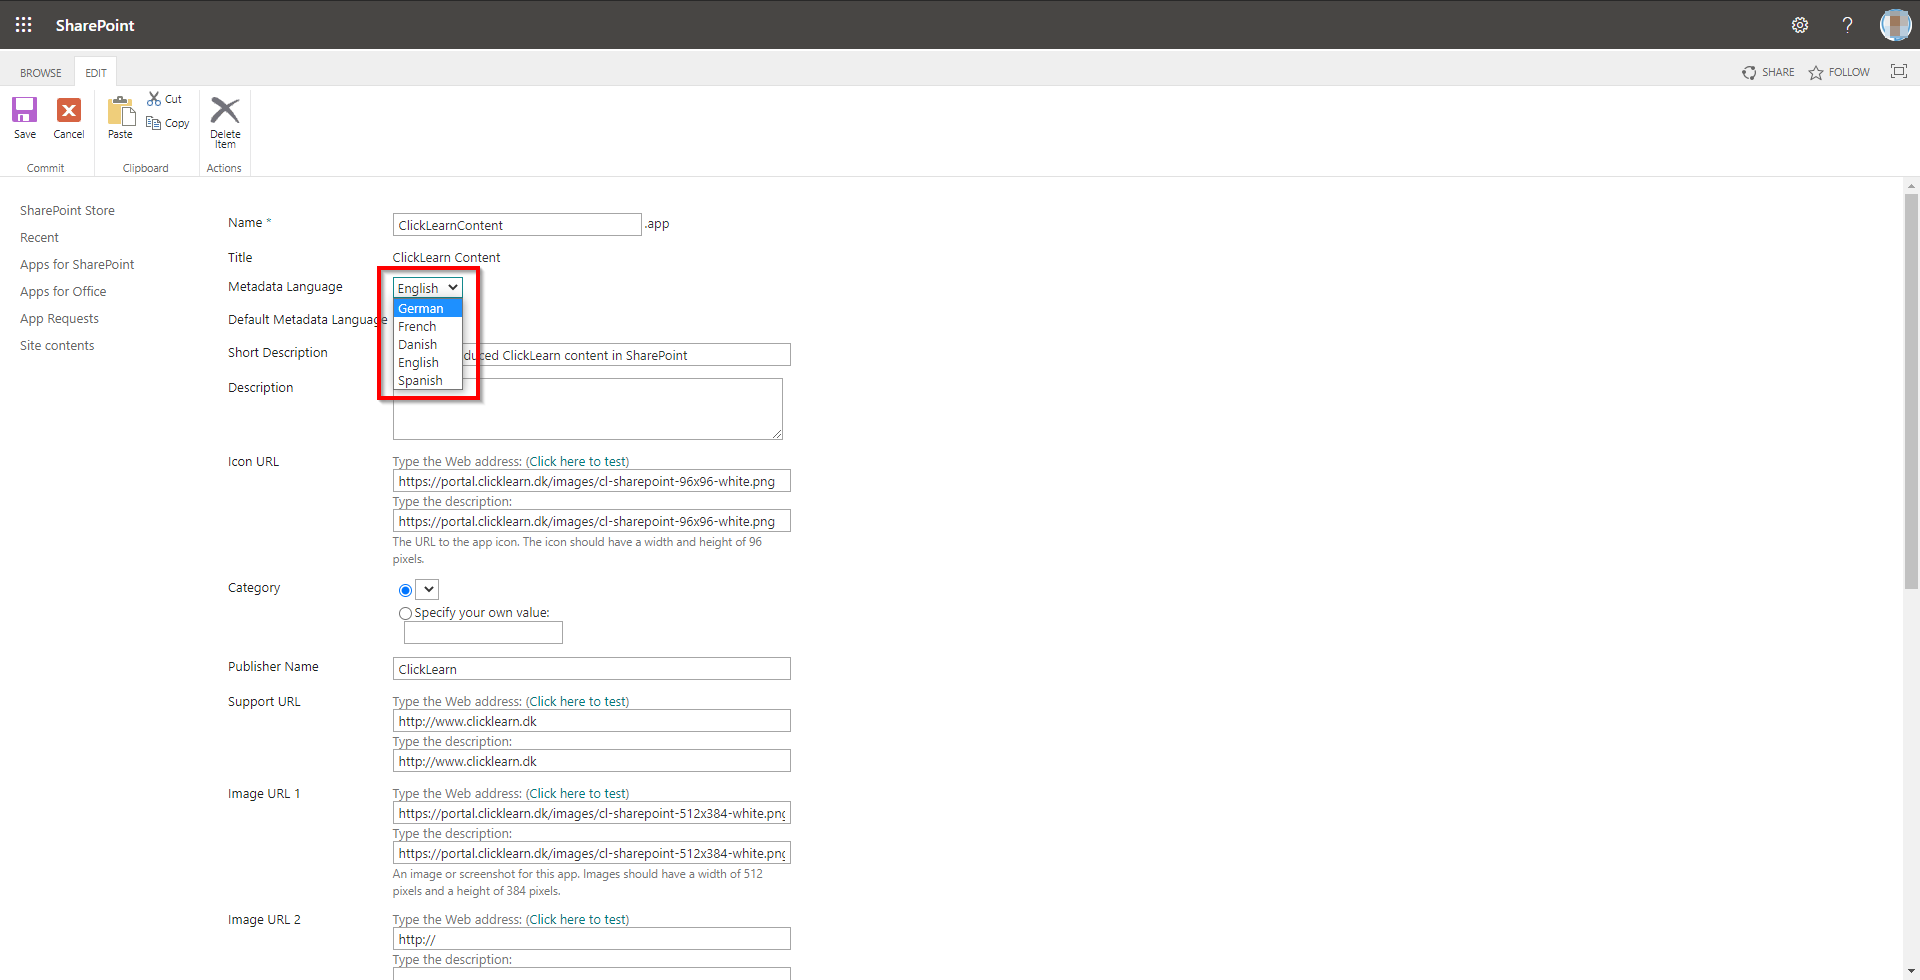
Choosing other language
You can choose a different language while uploading or installing the SharePoint app. You can do these selections from the Metadata Language and Select Installation Language fields.
Even though all messages and captions will be displayed in English, the SharePoint app will be supported in the selected language.
Adding the ClickLearn Content app to the SharePoint sub sites.
- Navigate to the SharePoint site where you want to deploy your learning content.
Note: As this feature is on a site level, adding the ClickLearn Content App to the site on the top level will not make it visible in the sub sites. You need to perform the following steps for each sub site where you want to use the ClickLearn Content App. For example, you might want to segment your learning content for different departments in your organization. You can follow the steps below to create a separate site for each department.
-
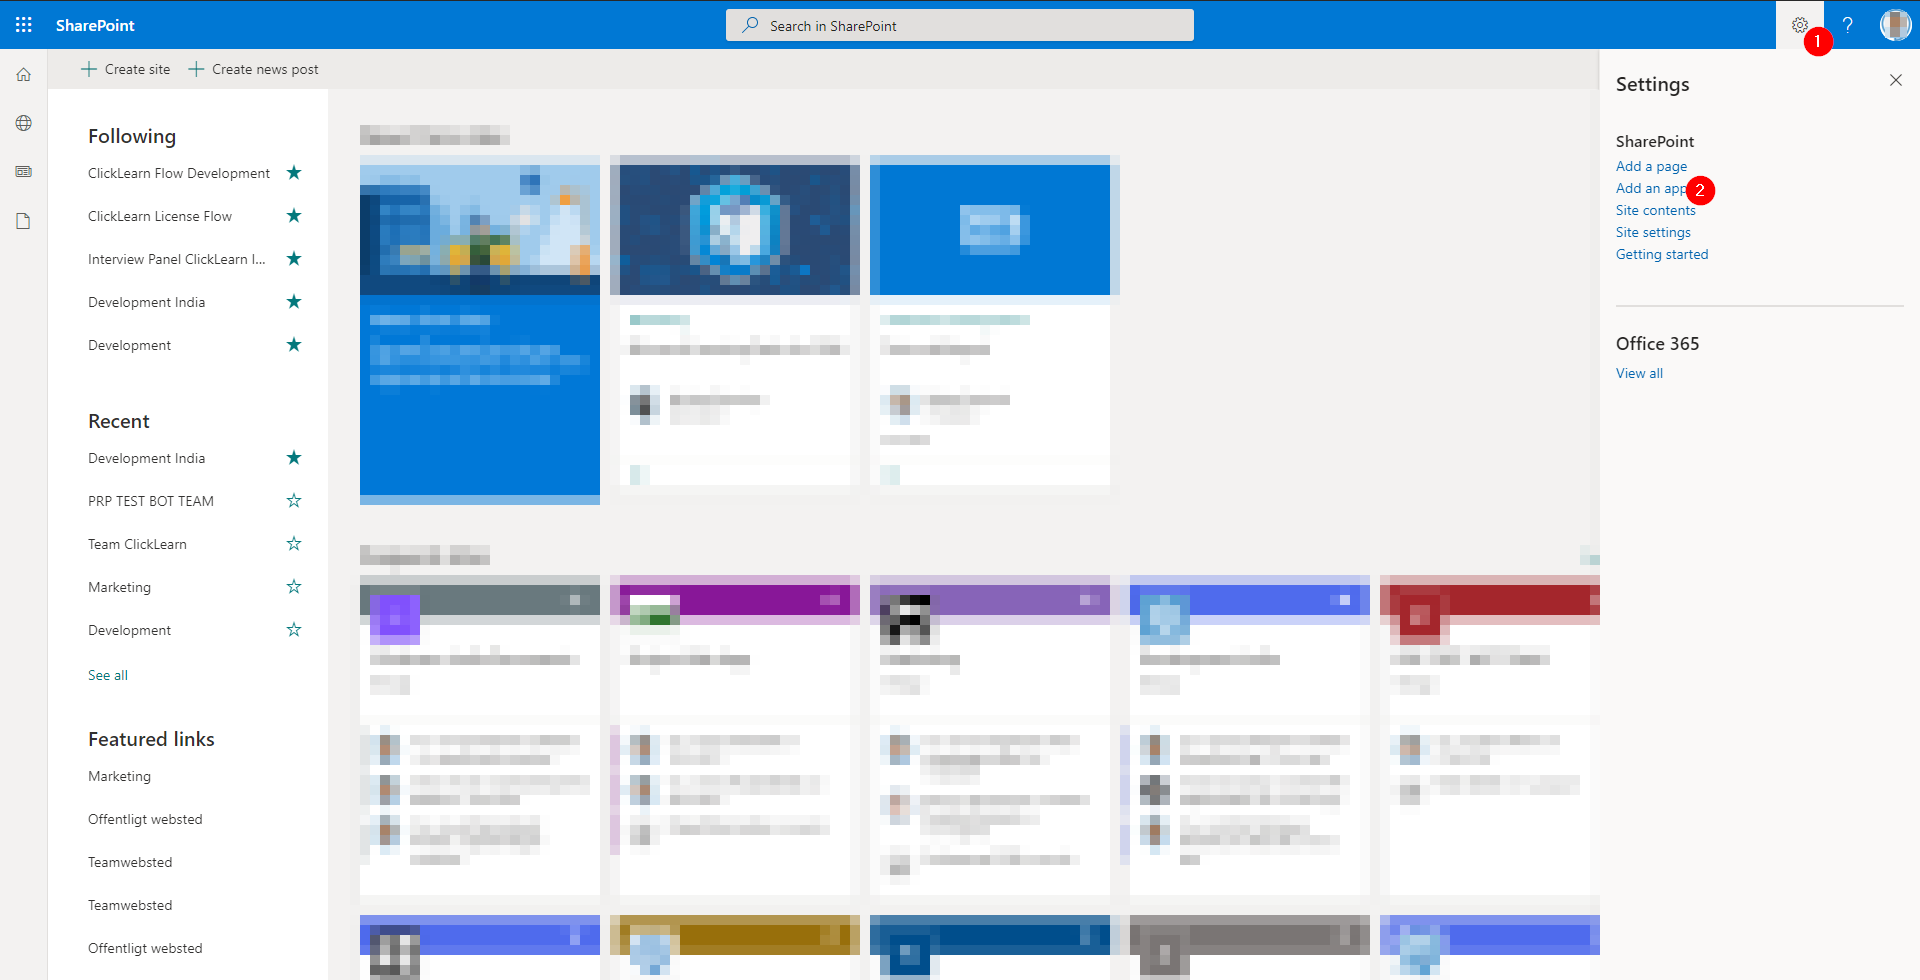
- Click the Settings icon on the top-right corner of the screen.
-
Click the Add an app option from the Office 365 Settings drop-down menu.
- In the panel on the left, click the Apps You Can Add option.
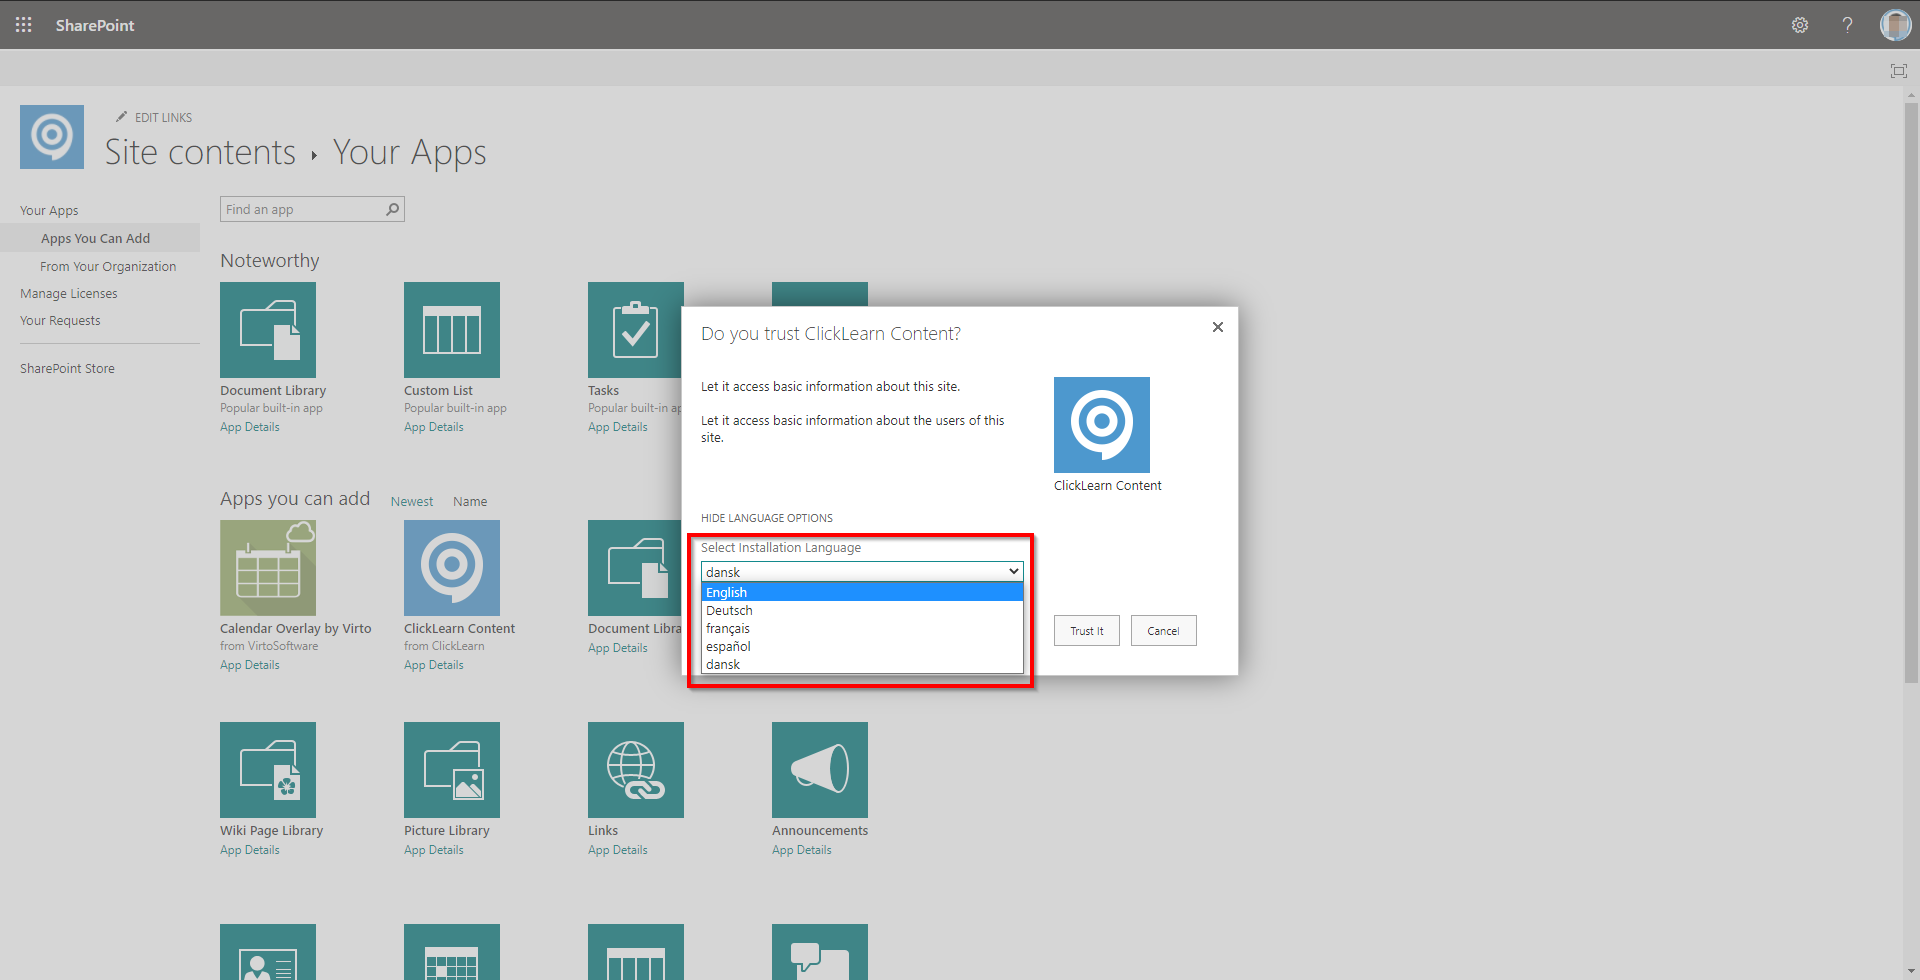
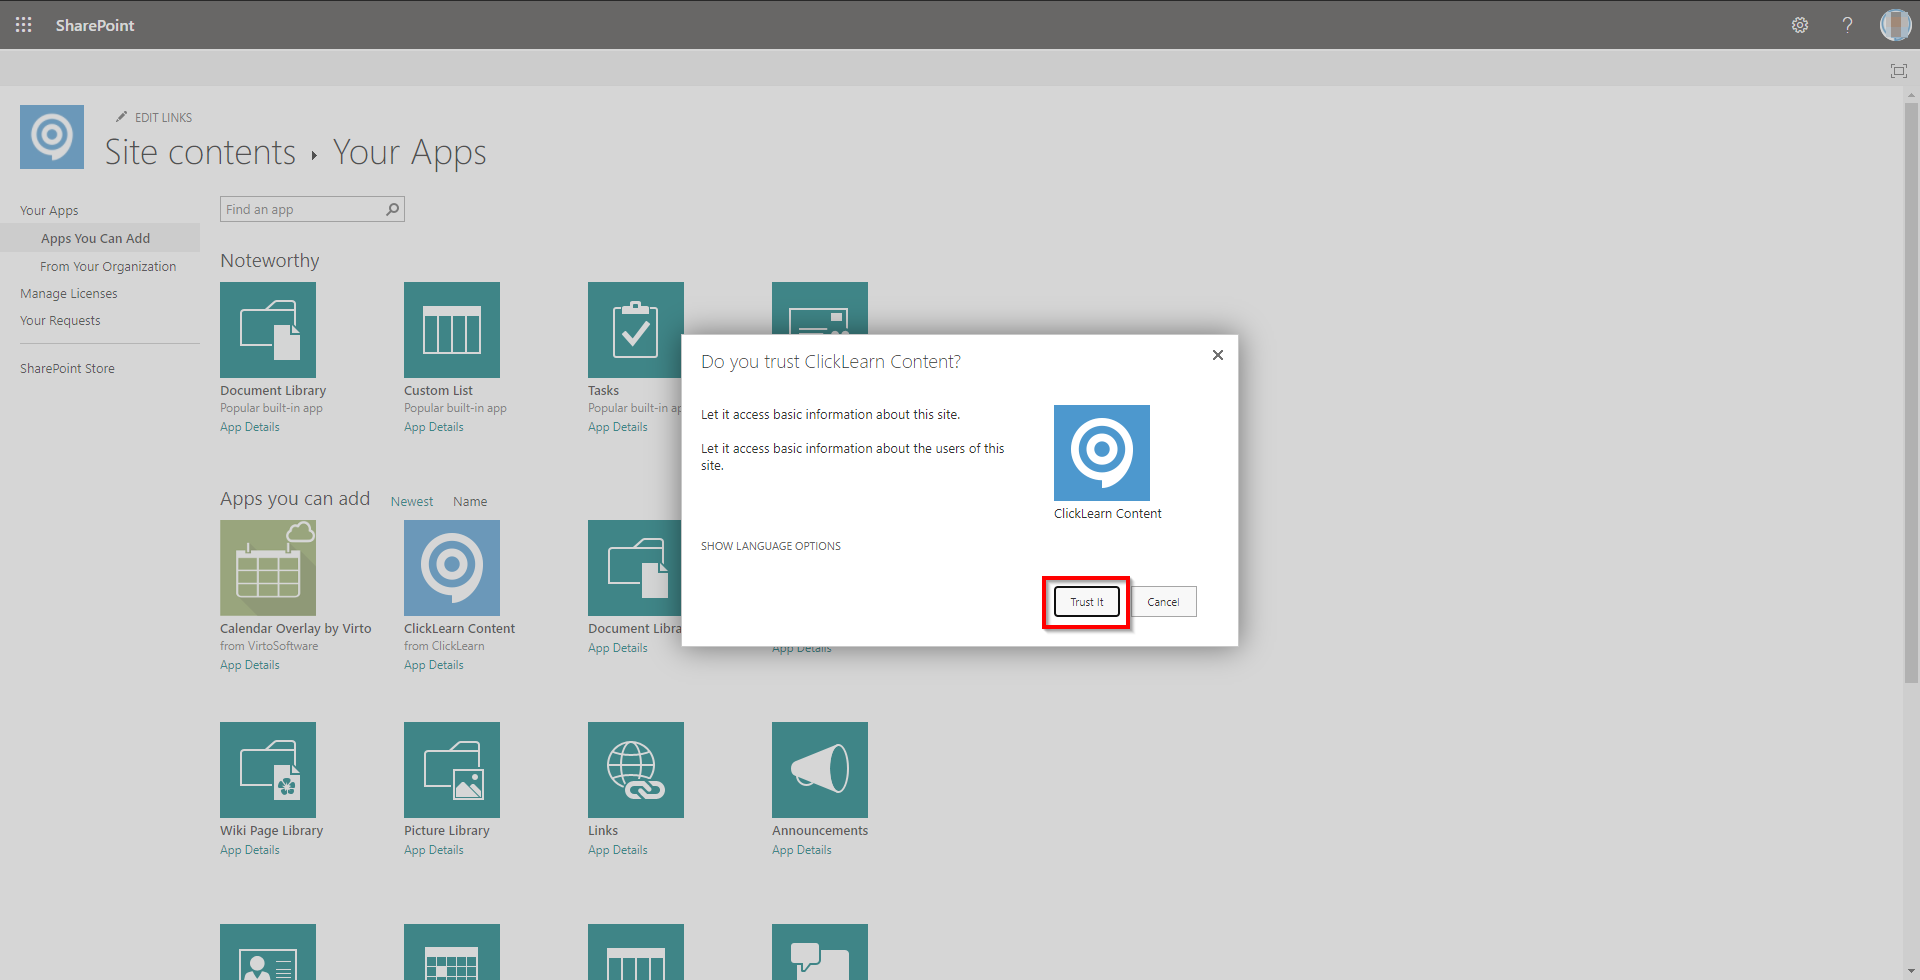
- Click the ClickLearn Content App.

- On the Do you trust ClickLearn Content? screen, click the Trust It button.
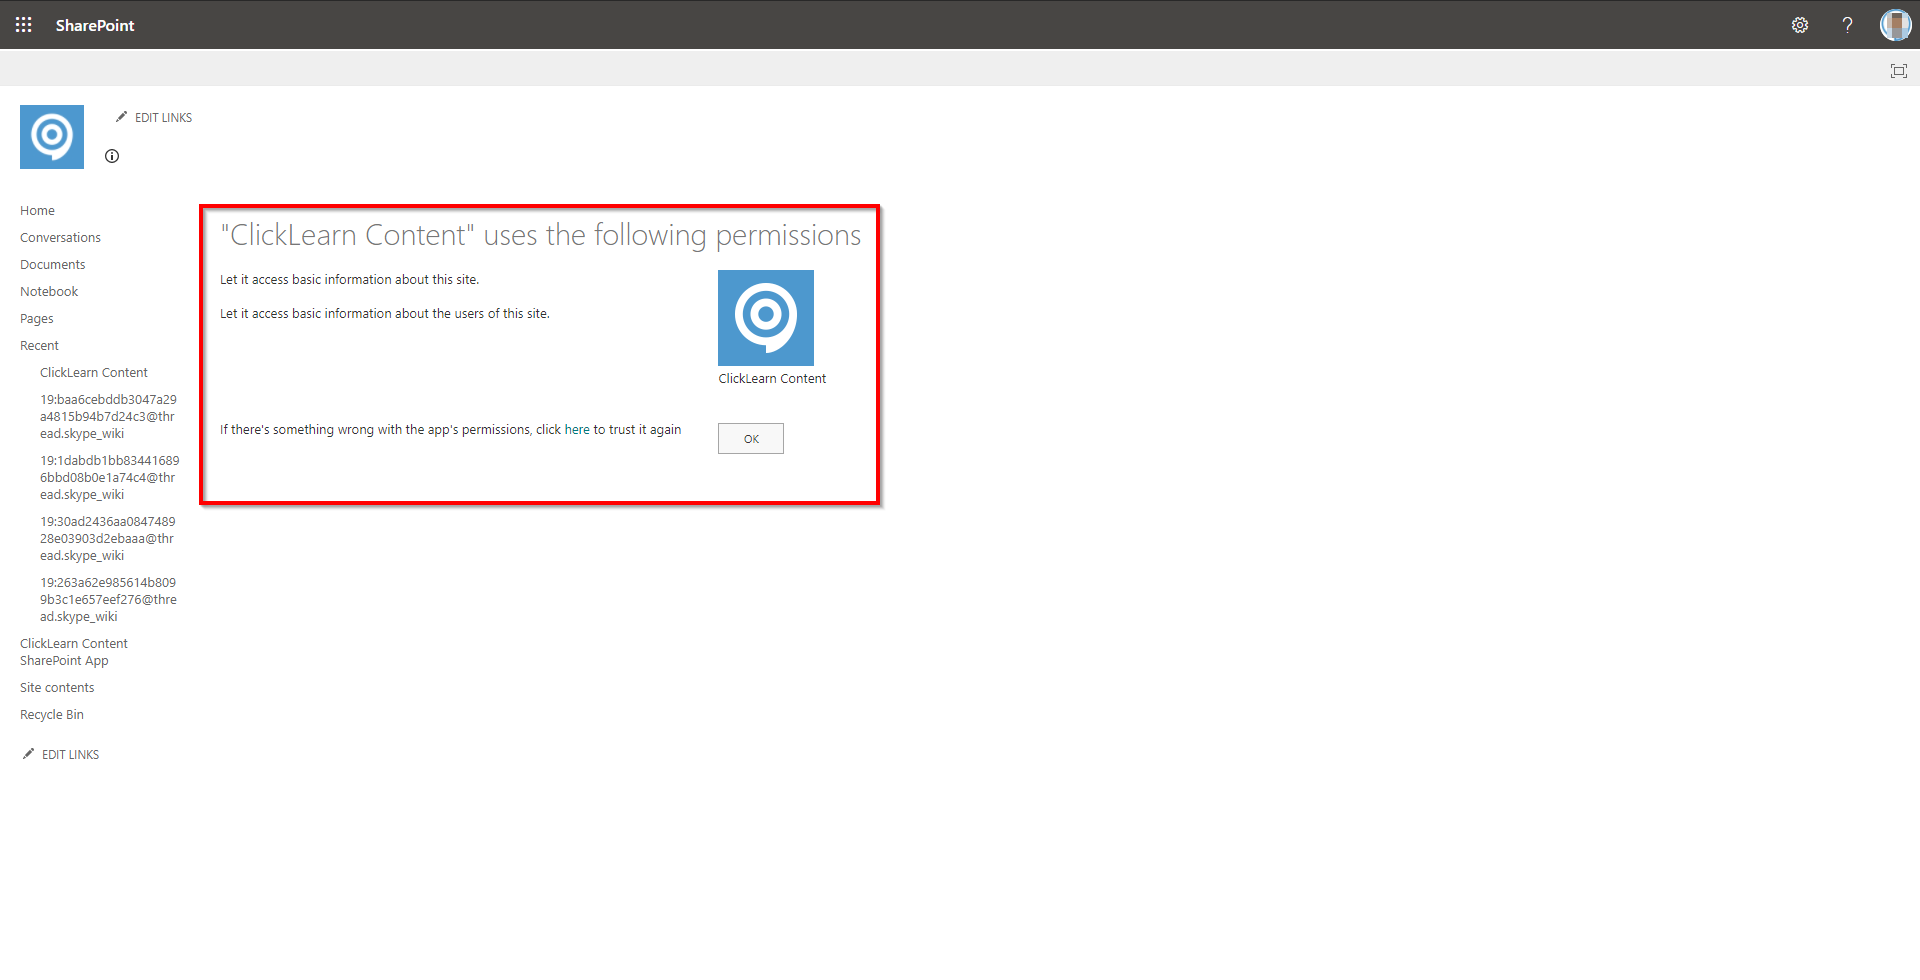
App requires basic permissions as shown below.
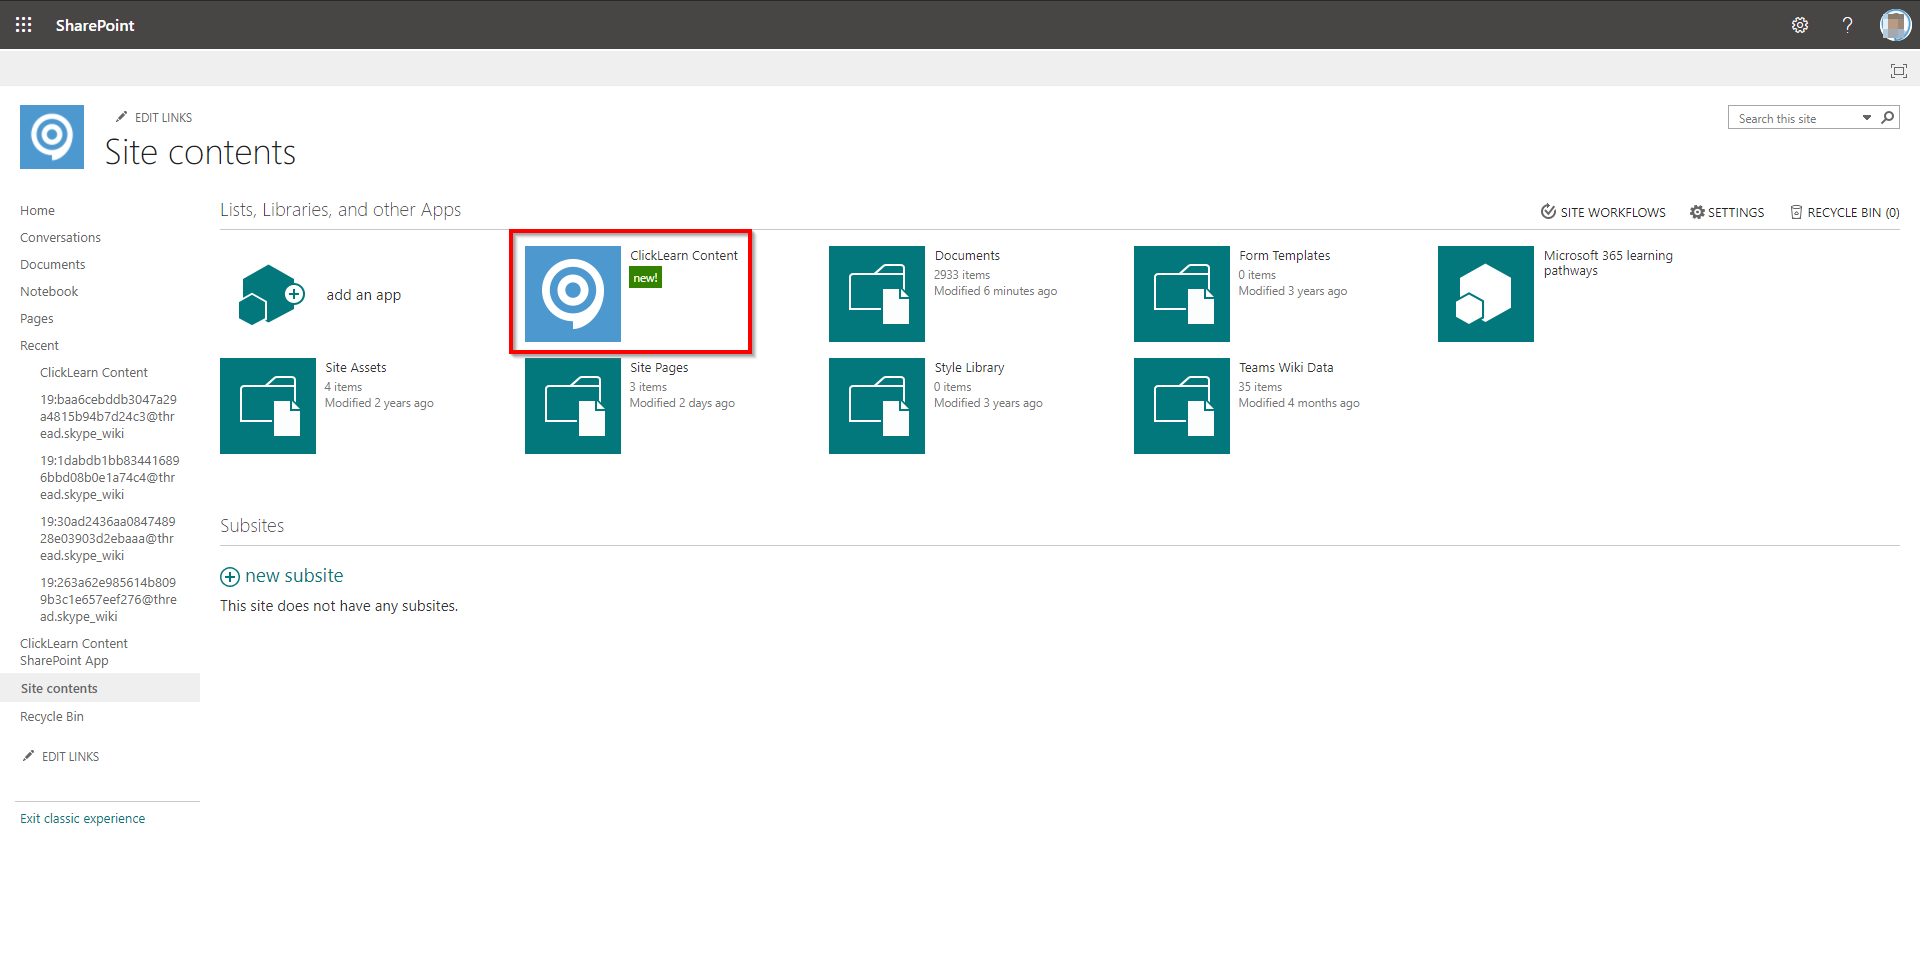
You will be redirected to the Site Contents page where you can see the ClickLearn Content app added.
Managing App Permissions
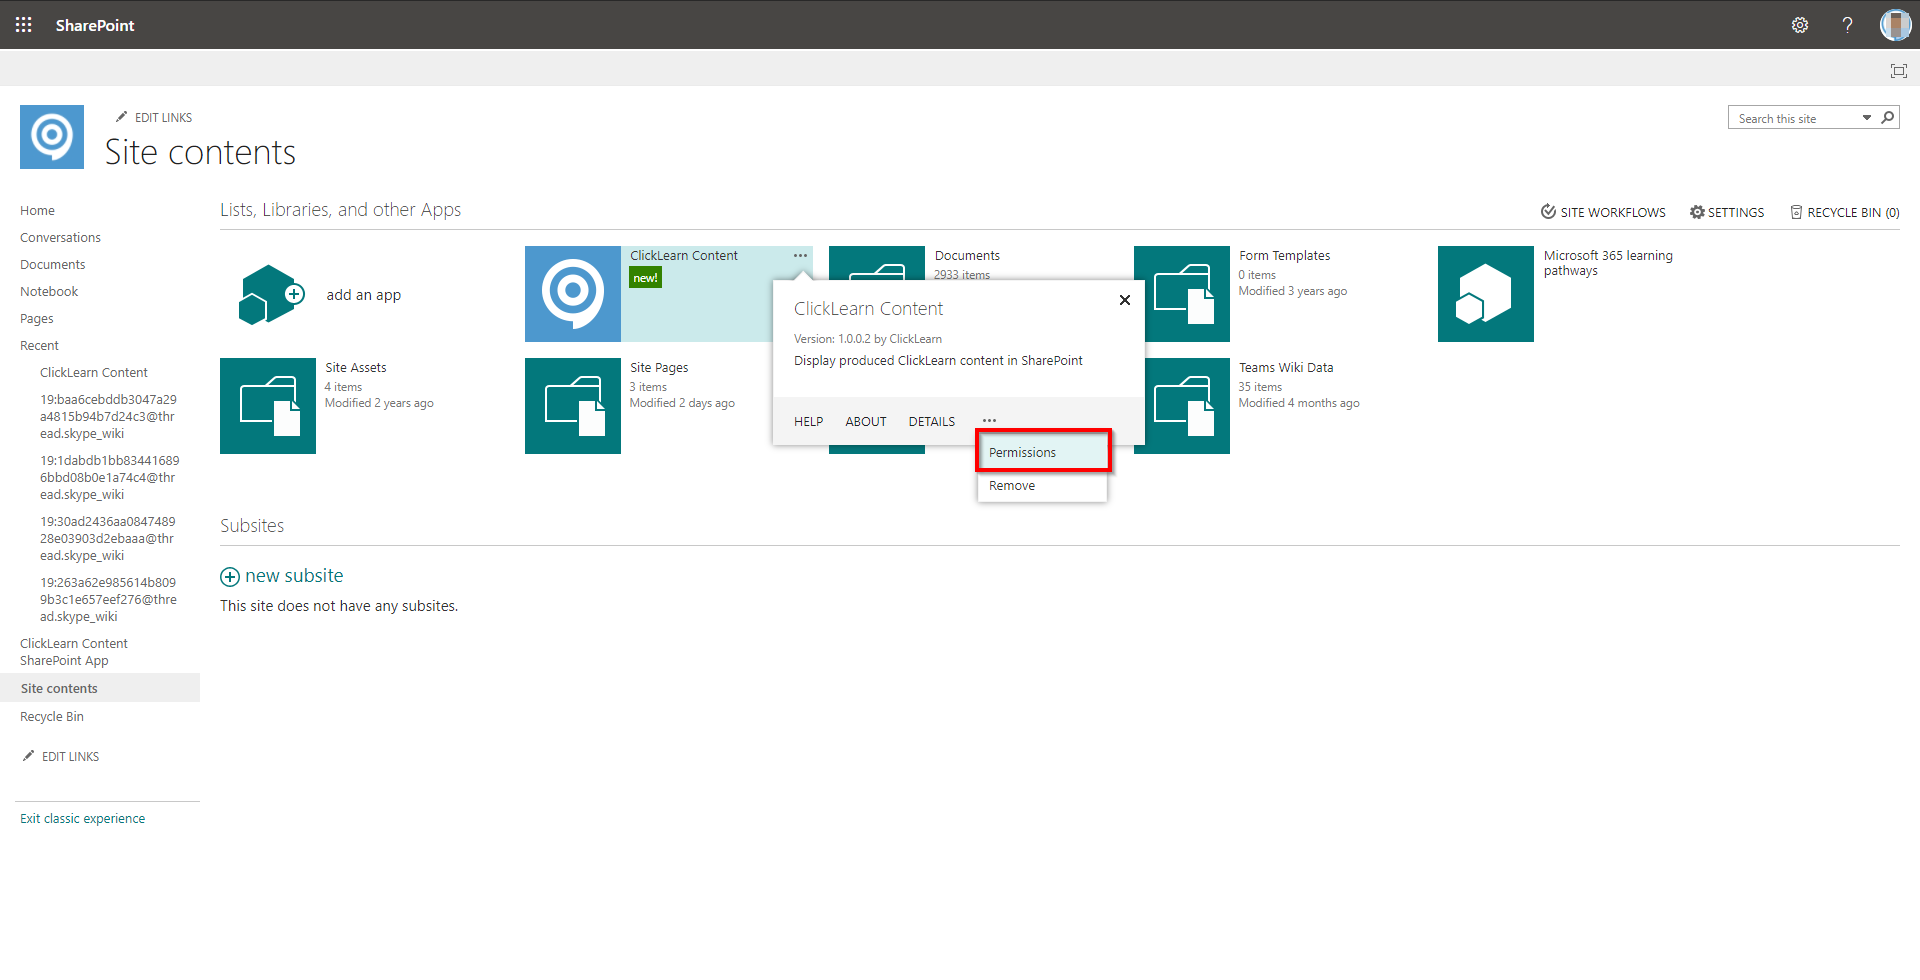
You can manage or update app permissions whenever required by navigating to the following path:
Site content > ClickLearn Content > Content Menu > PermissionsThis is shown in the screenshot below.
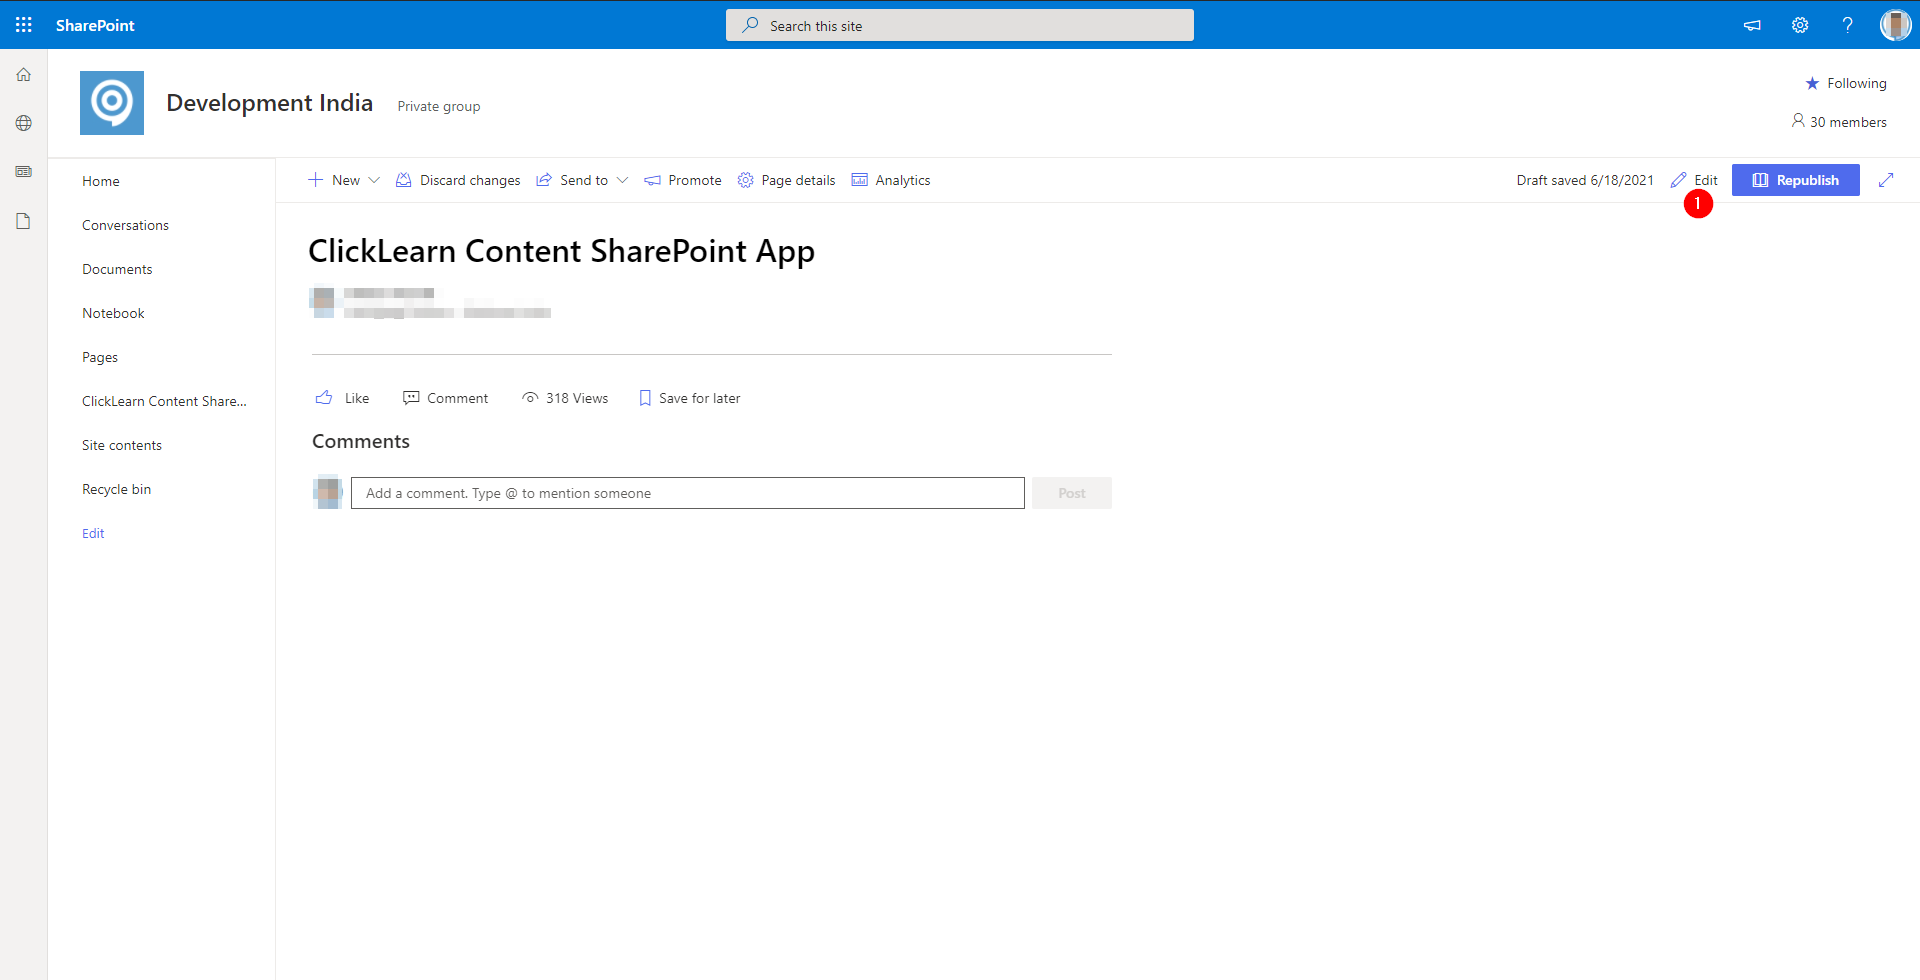
Adding the ClickLearn Content app to the SharePoint page
- Click the Edit button from the top right corner of the screen.
- Click the Add Part icon.
- Select the ClickLearn Content app from the box displayed.
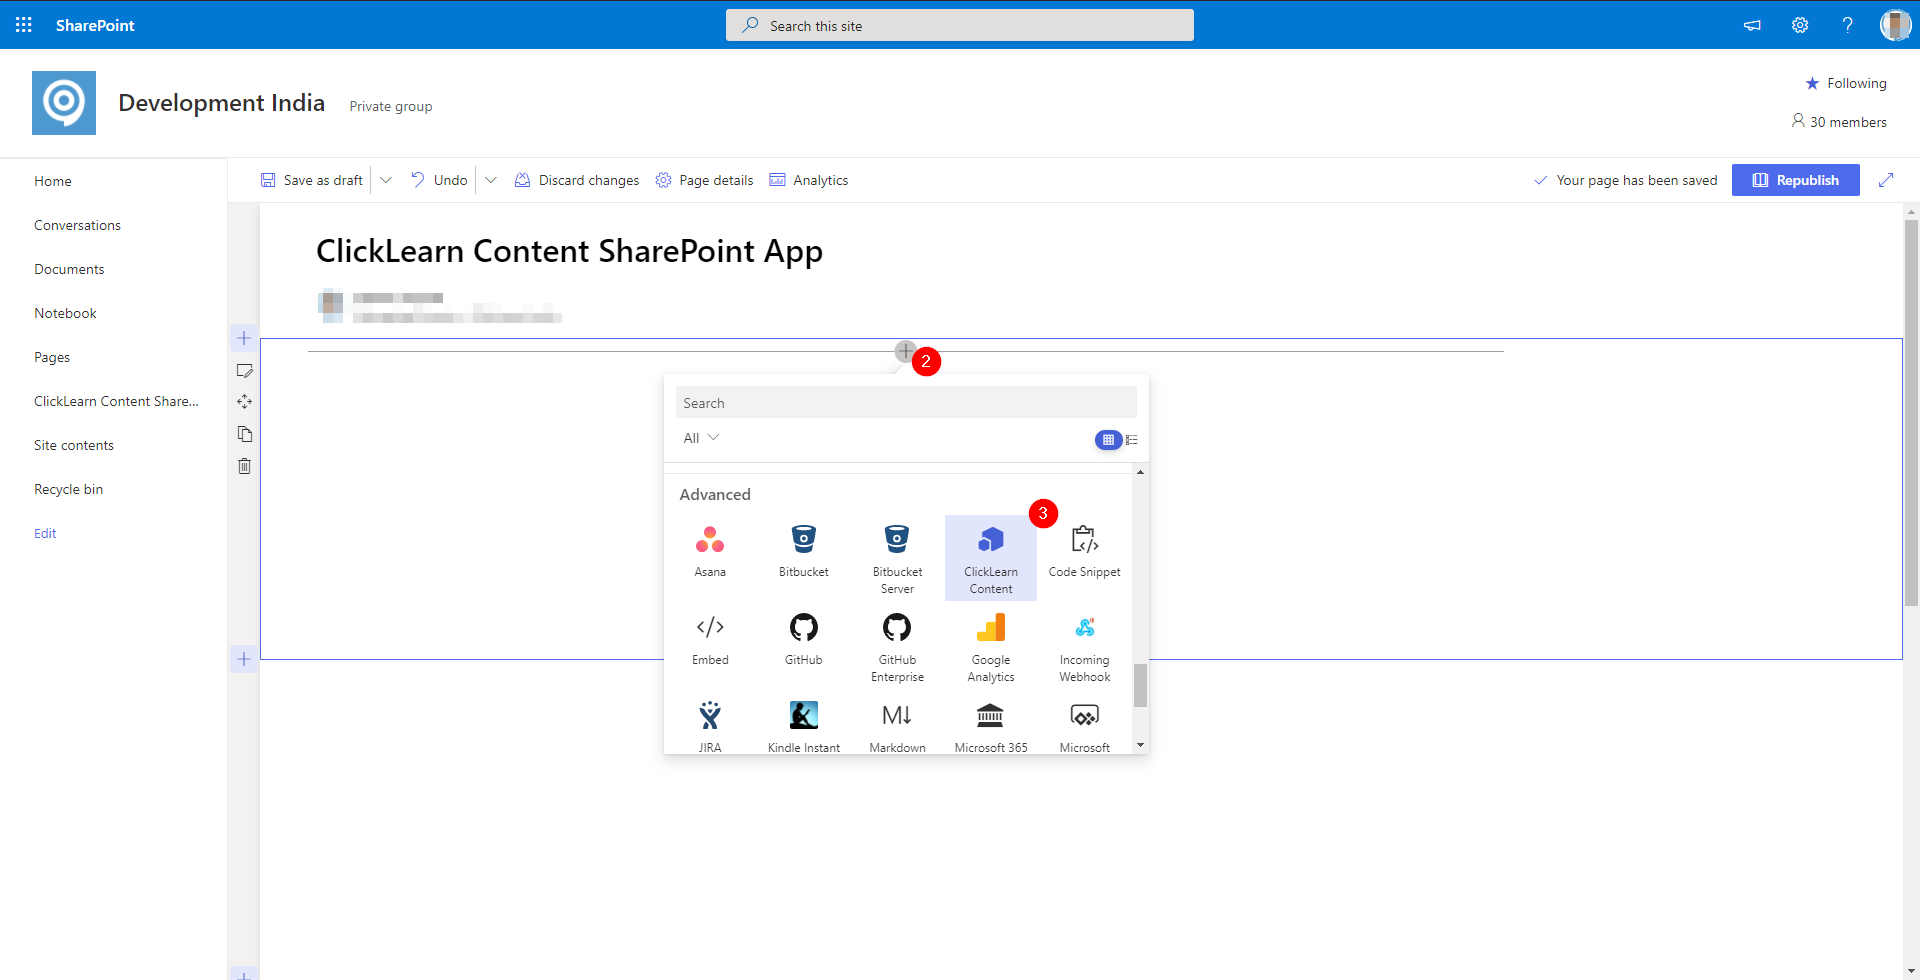
The ClickLearn Content App Part will be added to the page. However, it displays Content URL missing because you have not configured the content URL yet. You need to copy the content URL from the Publishing options in ClickLearn Attain. Follow the steps below to copy and add the content URL to the SharePoint site.
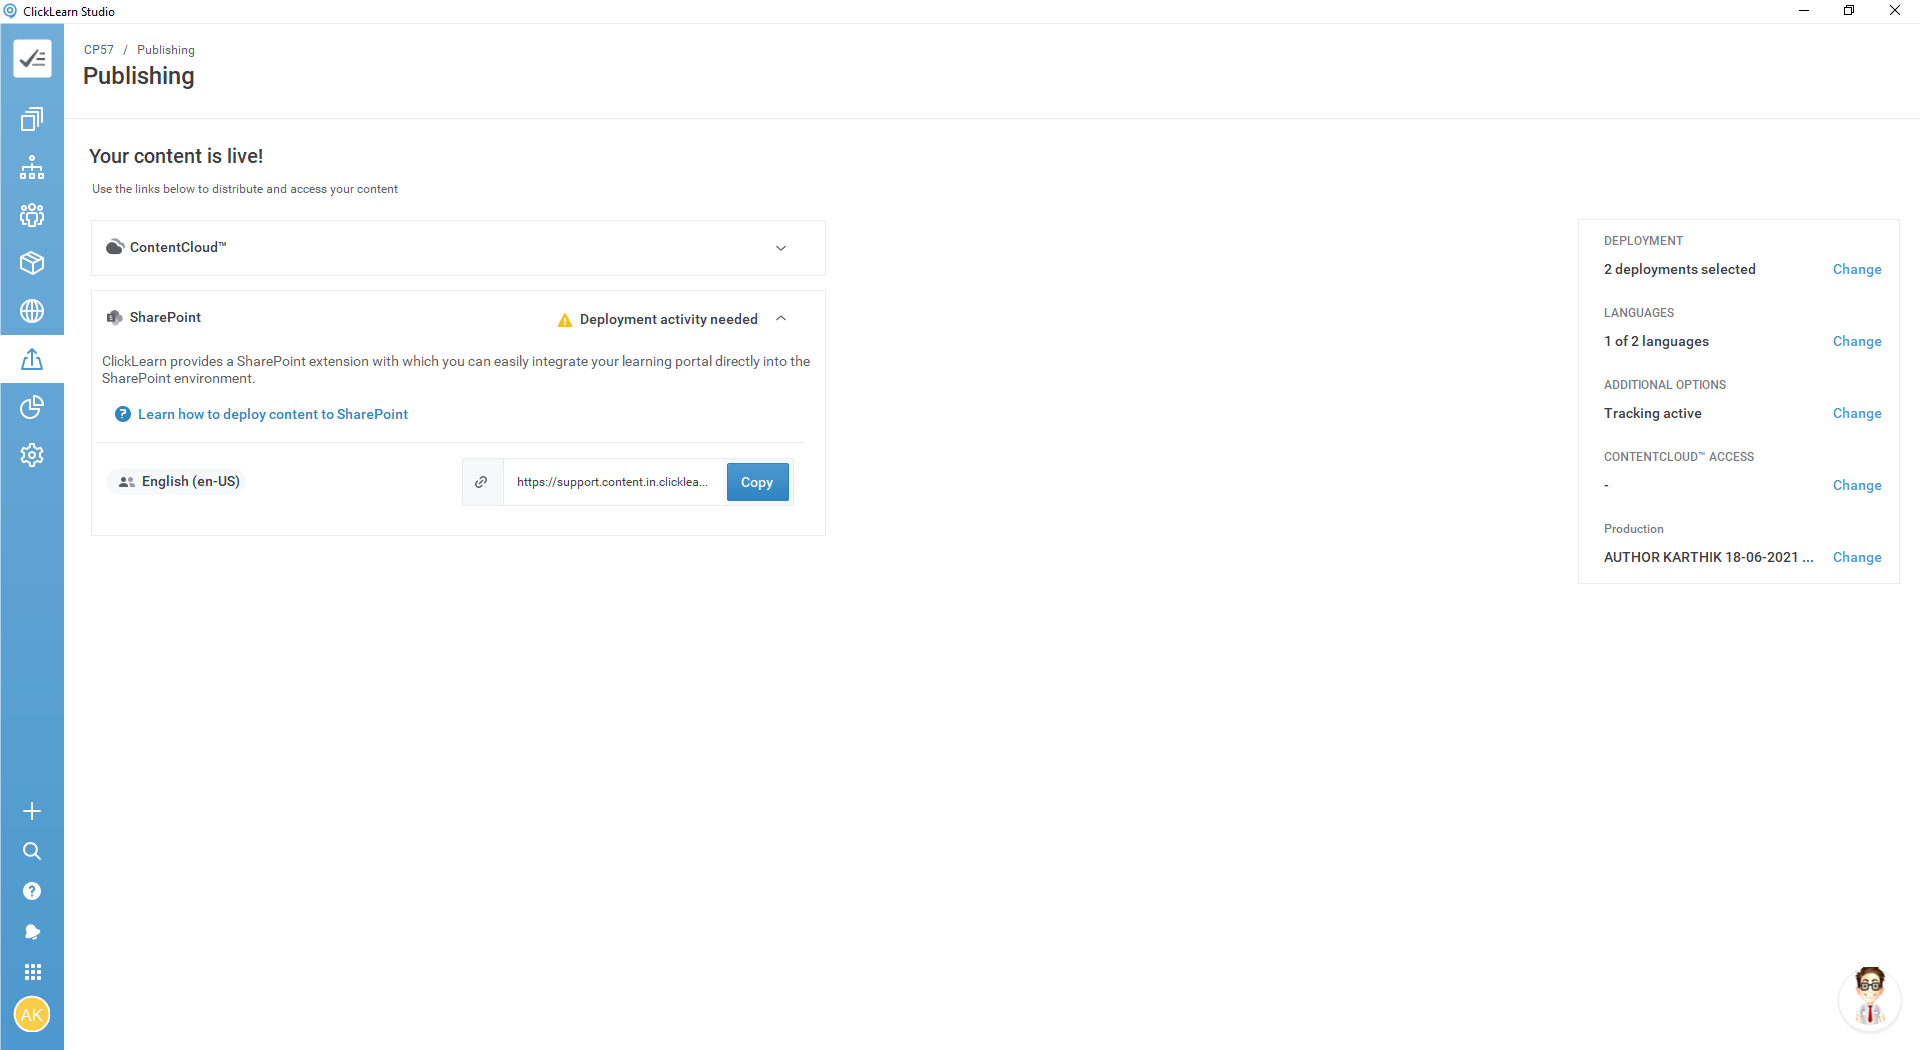
Copying the Content URL from ClickLearn Attain
The Publishing -> Lift-off screen in Attain lists the content URL(s) of the content published on the ContentCloud. While creating the structure for your learning portal, you might have done segmentation for your content based on languages or departments who will have access to some specific content. The content URLs are listed segment wise on the Lift-off screen.
To copy the required content URL, click the Copy button next to the content URL.
To add the copied content URL to the SharePoint site, follow the steps below.
Adding or Configuring the Content URL
- Select the Edit Web Part icon.
- Expand the Content Properties section in the right panel.
- Specify the content URL that you had copied from Attain in the Content URL text box.
- Click the Apply button.
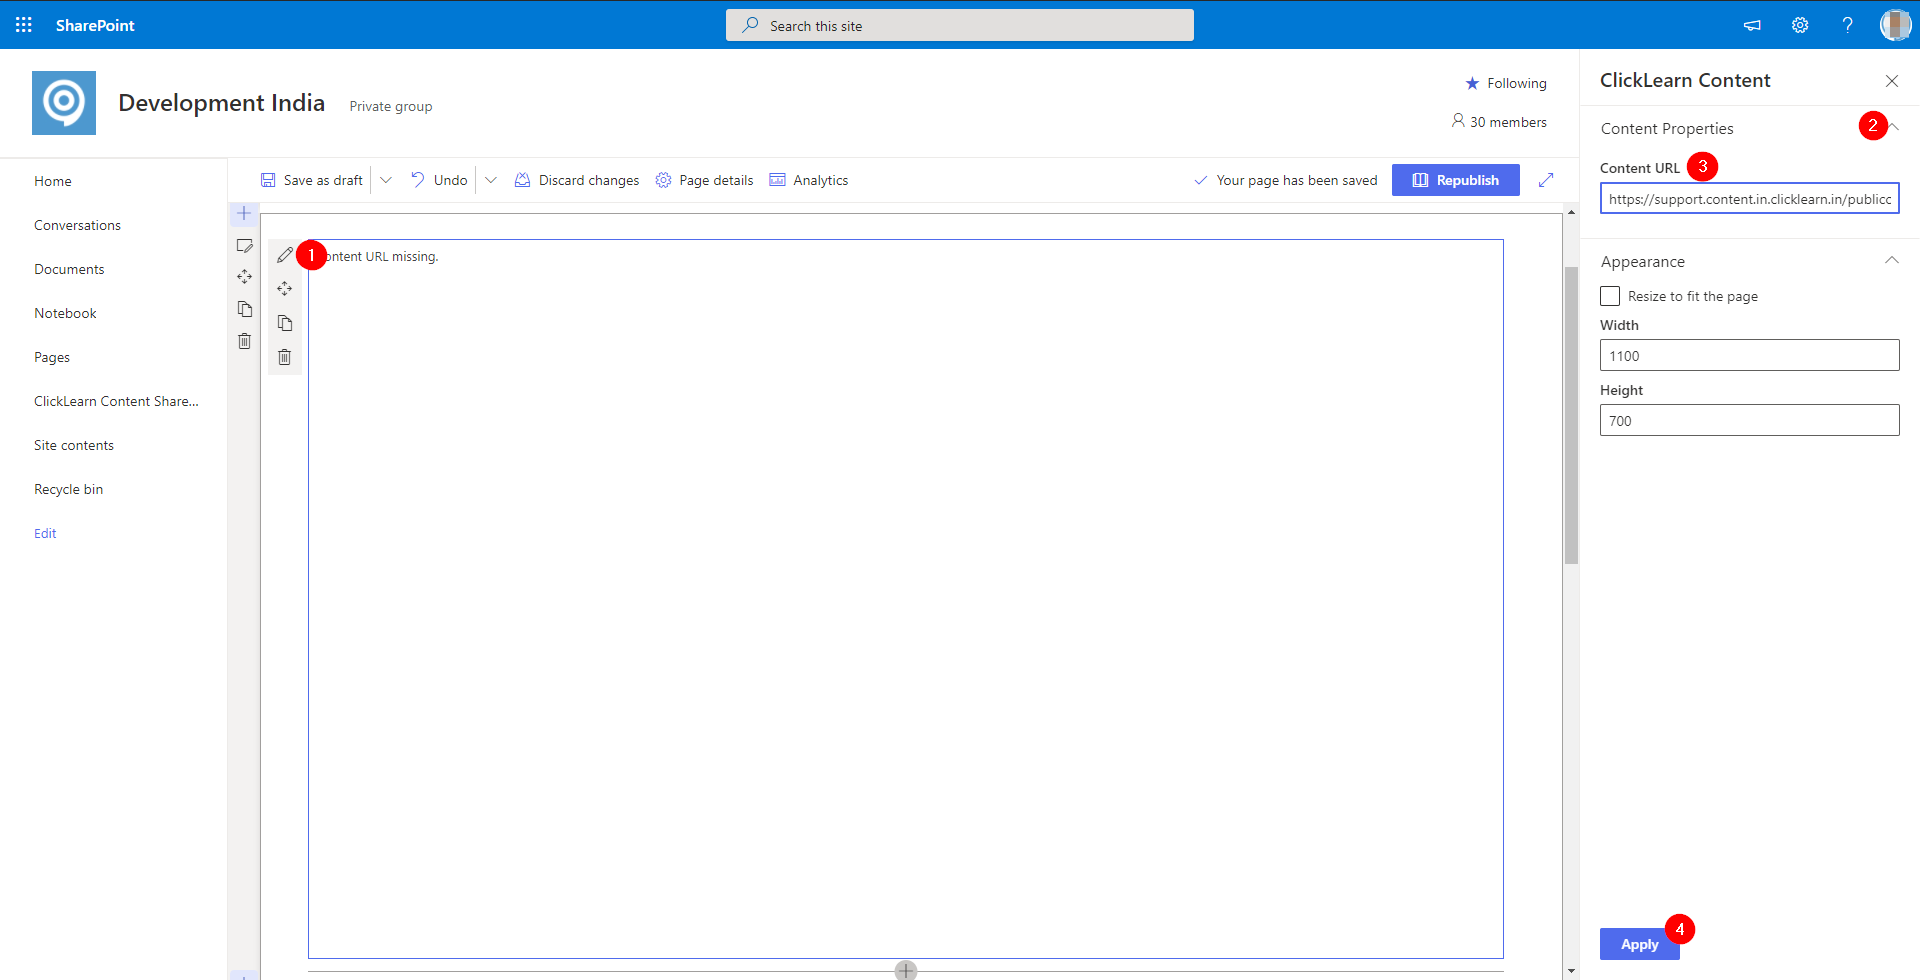
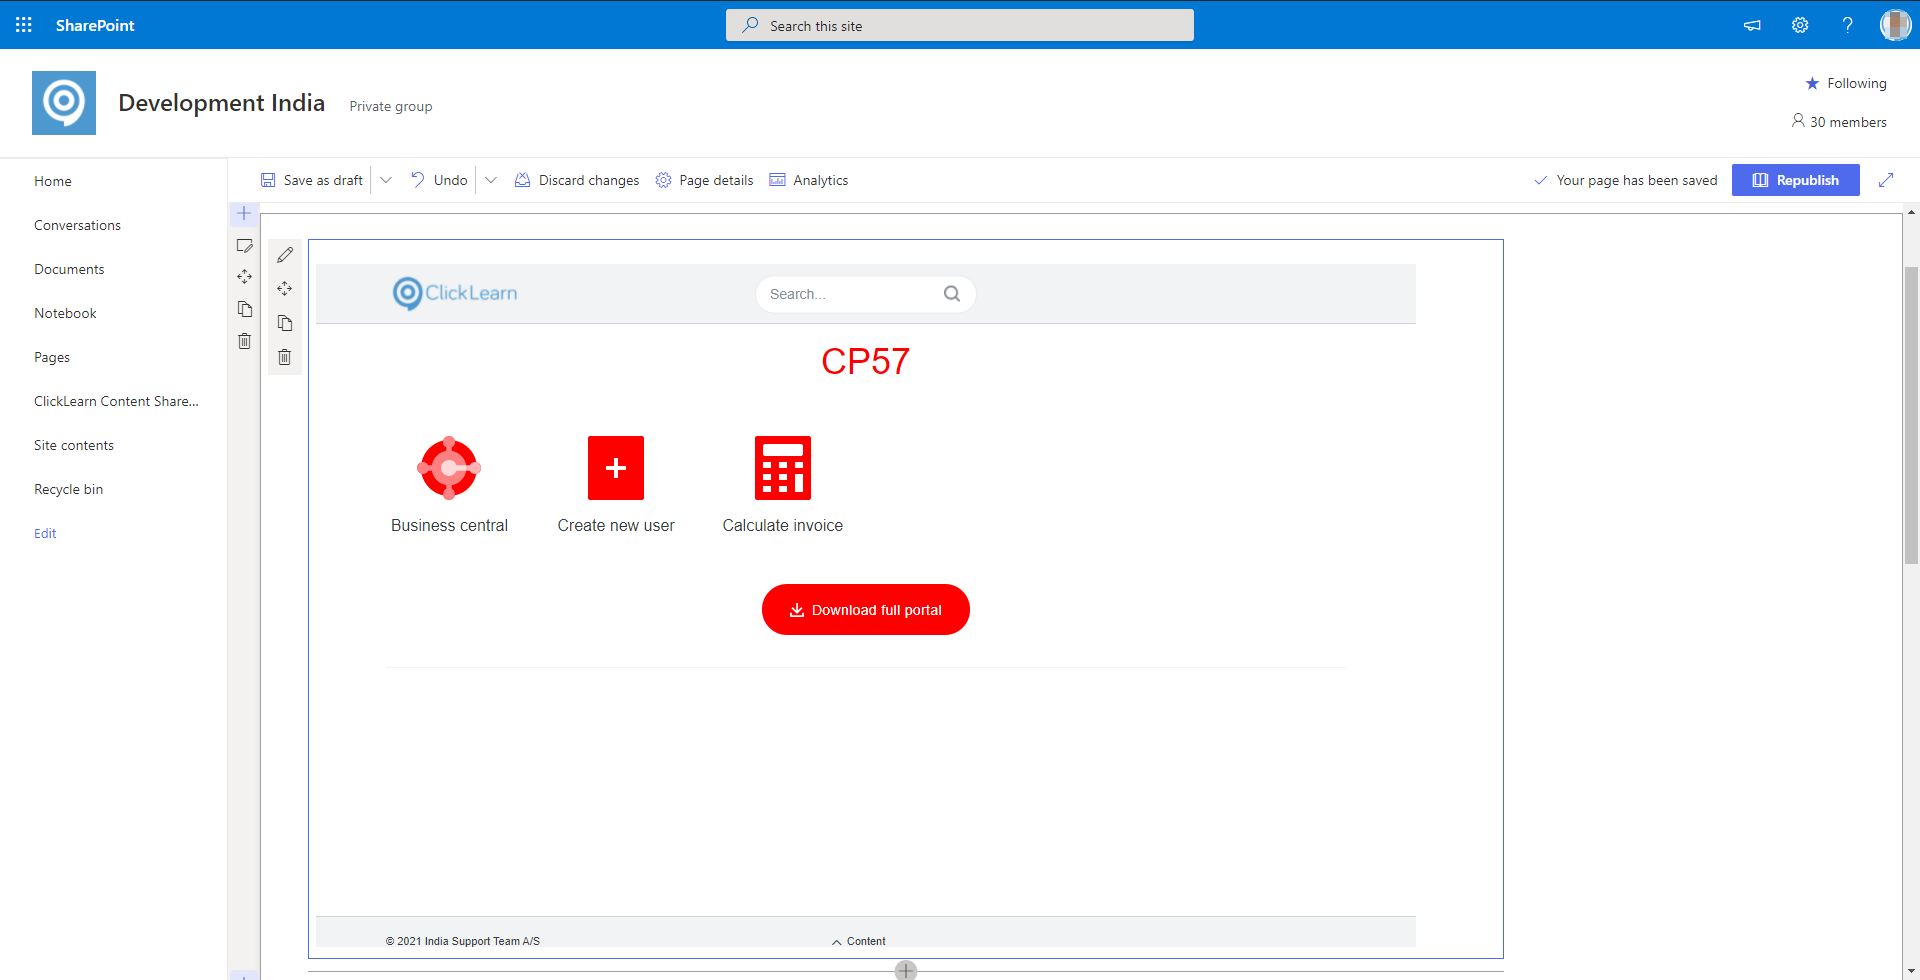
Content will be loaded as shown in the screenshot below. You can change the size of the content window by following the same steps as given above. The changes made to the page are saved automatically.
